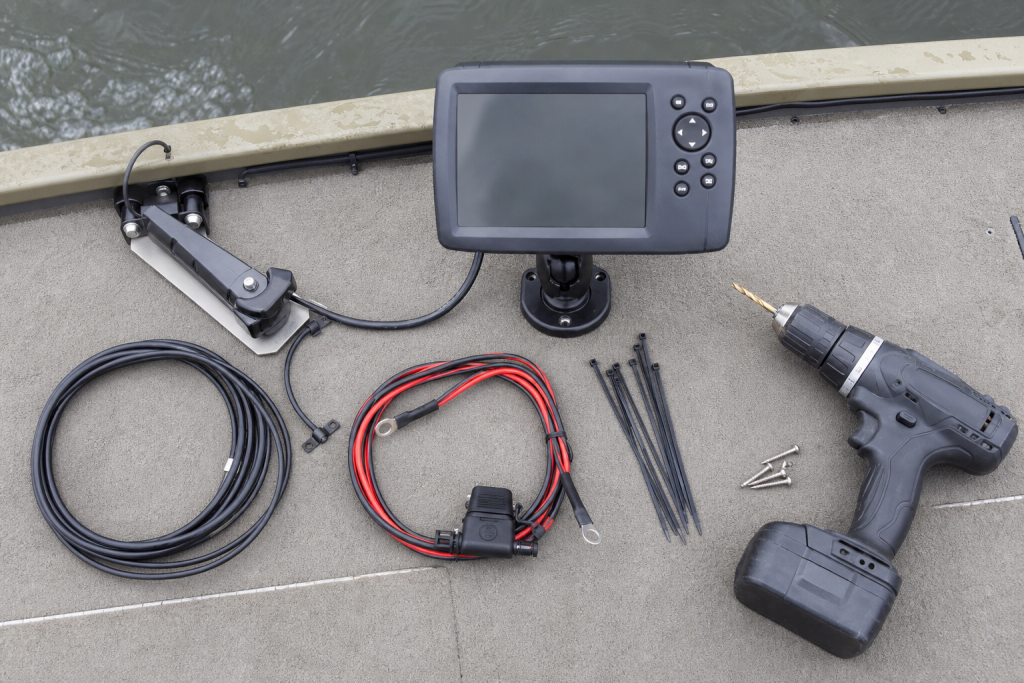
Beginner-friendly fish finder installation guide covering display mounts, power, transducers, batteries, and common mistakes.
Quick answer: This guide explains fish finder installation guide in practical terms, including the key choices, common mistakes, and on-the-water details anglers should understand before the next trip.
Affiliate disclosure: This article contains affiliate links. If you buy through these links, The Anglers Hub may earn a commission at no extra cost to you. Our recommendations are research-based and built from manufacturer specifications, public product information, feature comparisons, pricing/value, installation requirements, upgrade paths, and use-case fit for bass, kayak, and beginner anglers.
A fish finder installation succeeds or fails on basics: stable display mount, clean power, correct fuse, protected cable runs, and a transducer that sits in clean water. This guide explains the decisions to make before drilling holes or ordering accessories.
Plan Before Buying Accessories
Start with the display, battery, and transducer path
The best install is the one that matches your boat or kayak before you buy extra mounts and cables.
See Current PriceEvaluation Methodology
We compared fish finders by screen size, sonar type, mapping support, transducer requirements, installation complexity, power draw, networking and upgrade path, pricing, and suitability for bass fishing, kayak fishing, and beginner anglers. Product recommendations are based on specifications, public product information, feature tradeoffs, and use-case fit rather than undisclosed personal product use.
This guide evaluates installation decisions by reliability, beginner difficulty, serviceability, power safety, transducer signal quality, and whether the setup can support later upgrades.
| Install Area | Best Practice | Mistake To Avoid |
|---|---|---|
| nDisplay mount | Place where it is readable and reachable | Mounting where glare or rods block it |
| Power | Use proper fuse and clean battery connection | Sharing noisy circuits without planning |
| Transducer | Keep it in clean water and level | Mounting behind turbulence or obstruction |
| Cable routing | Protect from pinch points | Loose cable near pedals, hatches, or motor |
Scroll horizontally on small screens to view all columns.
Step 1: Choose The Display Location
Put the screen where you can read it without changing your normal fishing position. Bass boats often use bow and console locations; kayaks need rail or track mounts that do not block paddling, standing, or landing fish.
Step 2: Plan Power
Use the fuse size recommended by the manufacturer and keep wiring tidy. Small kayak units can run from compact batteries; larger boat displays and future sonar modules may need more capacity. Voltage drop can create confusing restarts and screen issues.
Step 3: Place The Transducer
The transducer needs clean water and the correct angle. Transom mounts, trolling motor mounts, scupper mounts, and arm mounts all work when matched to the boat. For more detail, read the transducer placement guide.
Beginner Buying Advice
Before choosing a premium unit such as the Garmin ECHOMAP UHD 93sv or Lowrance Elite FS 9, price the full install: mount, wiring, battery, transducer hardware, and maps.
Related: side imaging vs down imaging and the fish finder pillar.
Author Credibility
The Anglers Hub evaluates fishing electronics from a practical angler perspective: what the specs mean on a bass boat, kayak, jon boat, or beginner setup; what features matter for different water types; and where upgrade paths can save money later. We do not claim personal ownership or personal product use of a product unless that information is clearly stated in the article.
Fish Finder Installation FAQ
Can I install a fish finder myself?
Many anglers can handle simple installs, but wiring, drilling, and transducer placement require care. When in doubt, use a qualified marine installer.
Do I need a separate battery?
Kayaks often use a dedicated compact battery. Boats may use existing systems, but clean power and proper fusing matter.
Where should I mount the transducer?
Place it in clean, non-aerated water with the correct angle and an unobstructed sonar view. The exact location depends on hull and transducer type.
Budget install parts list
Common rigging items for a clean first install on jon boats and small bass boats.
Attwood Battery Box Small
Price:Under $25
Basic 12V battery box for fish finders and small electronics on jon boats and kayaks.
- Secure hold-down
- Ventilated design
- Common size for group 27 batteries
12V Marine Fuse Block
Price:Under $20
Inline fuse protection when wiring a fish finder or accessories to a boat battery.
- Protects electronics
- Clean wiring hub
- Standard install part
Transom Mount Transducer Bracket
Price:Under $20
Adjustable transducer bracket for small boats and jon boats when you need clean sonar water.
- Easy install
- Works with common transducers
- Budget rigging fix
SanDisk Ultra microSD 32GB
Price:Under $12
Map and waypoint storage for Garmin, Humminbird, and Lowrance units that use microSD cards.
- Widely compatible
- Enough space for regional maps
- Inexpensive spare card
As an Amazon Associate we earn from qualifying purchases.
Kayak installations need a dedicated power plan. Use the battery runtime calculator and fused wiring diagram before sizing the battery box and connectors.
Editor Note
Gear mentions and recommendations are independently evaluated from specifications, public product information, pricing, use-case fit, and upgrade paths unless a specific article states direct product experience.
More From The Hub
Kayak Fish Finder Battery Runtime and Wiring Guide
Estimate fish finder battery runtime and build a safer kayak electronics circuit with correct voltage, usable capacity, fusing, wire, and connectors.
Read More
How to Read Side Imaging for Bass
Learn how returns, acoustic shadows, range, frequency, speed, and transducer setup affect what bass, baitfish, brush, rock, and grass look like.
Read More
A Simple Freshwater Fishing Setup That Covers Most Trips
Build one versatile beginner freshwater spinning setup with the right rod, reel, line, lures, drag, knots, and pre-trip checklist.
Read More